To drill a hole at 45 degrees, use a drill guide set to a 45 degree angle or make a jig with scrap wood angled at 45 degrees. Secure the guide or jig, position the drill bit, and proceed to drill.
Drilling holes at precise angles can be essential for successful woodworking and construction projects. Achieving a clean, accurate 45-degree hole requires the right tools and technique. Whether you’re constructing beveled edges, making joint connections, or handling complex carpentry tasks, mastering the art of angled drilling is key.
The trick lies in steadying the drill and maintaining the correct angle throughout the process. While professional carpenters might use a drill press with an angled vise, DIY enthusiasts can use simpler setups like a specifically angled drill guide or a homemade jig to ensure precision and ease. Careful alignment and a steady hand will lead to perfect results time after time.

Credit: www.youtube.com
Getting Started With Angled Drilling
Drilling a hole at a precise 45-degree angle requires skill, attention to detail, and the right tools. Perfect for woodworking projects where diagonal joints or angled screws are necessary, mastering this technique can take your craftsmanship to the next level. Below are essential tips to help you drill with confidence and accuracy.
Selecting The Right Tools
Quality tools make a difference when it comes to angled drilling. Ensure success with the following items:
- Power Drill: Opt for one with variable speeds.
- Angle Guide: Essential for maintaining the correct angle.
- Drill Bits: Sharp and suited for the material you’re working with.
- Clamps: To secure your workpiece firmly.
- Safety Gear: Glasses and gloves to protect you during the job.
Understanding Wood Grain And Material Considerations
Before you drill, grasp these key points:
| Consideration | Why It Matters |
|---|---|
| Grain Direction | Aligning with the grain reduces the chance of splintering. |
| Material Hardness | Harder materials require more power and a steady hand. |
| Size of Drill Bit | Start with a smaller bit and work up to the final size for better control. |
:max_bytes(150000):strip_icc()/how-to-drill-at-an-angle-1822332_hero-1e78c34c81bd444eb6e9d50016680a81.jpg)
Credit: www.thespruce.com
Setting Up For Precision
Drilling a perfect 45-degree hole requires precision. But don’t worry, we’ll walk you through the setup step by step. By following these guidelines, you’ll achieve the accuracy you’re aiming for. Let’s get started!
Marking Your Workpiece
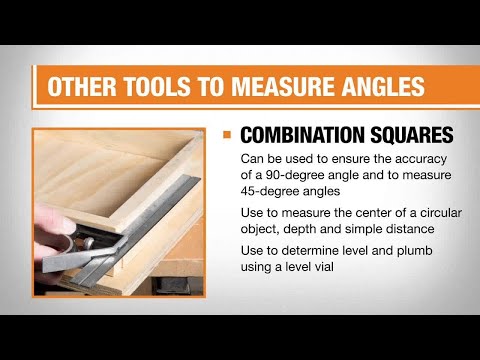
First, you need to measure and mark where you want the hole to be on your wooden piece. Use a combination square set at a 45-degree angle to make sure your mark is precise. This tool helps by providing a straight edge aligned to your desired angle. Now, draw a line where you plan to drill. Check the line twice to ensure accuracy—you want a perfect start for a perfect hole.
Securing The Wood For Drilling
Before drilling, it’s essential to secure the wood to prevent any movement. Use clamps to fasten the wood to your work surface. This keeps the wood stable, resulting in cleaner, safer drilling. Always double-check that the wood is held tightly. Now, you can drill without worrying about slips or shifts, knowing your workpiece is secure.
Mastering The 45-degree Hole Technique
Drilling at an angle can seem daunting to any woodworker or DIY enthusiast. Perfected skills and techniques result in precise and clean angled holes. One common requirement is a hole drilled at a 45-degree angle. Here are expert ways to achieve that perfect angled hole for your project.
Using A Drill Guide For Angled Holes
Drill guides are essential for ensuring accurate angles. Let’s break down the steps:
- Choose the right drill guide. Pick a guide that allows 45-degree angles.
- Secure the workpiece. Clamp it down to prevent movement.
- Set the guide. Adjust it to the exact 45-degree mark.
- Insert the drill bit. Choose the appropriate size for the hole.
- Begin drilling. Apply steady pressure and let the guide do its job.
This method takes the guesswork out of angle drilling
Freehand Drilling: Tips And Tricks
Freehand drilling at a 45-degree angle is tricky but possible. Follow these tips:
- Mark the spot. Use a pencil and a speed square to define the angle and starting point.
- Steady your drill. Hold the drill firmly, aligning it with the marks.
- Start slow. Begin with a low speed to establish the path.
- Maintain the angle. Keep an eye on alignment as you drill deeper.
- Be patient. Do not rush; allow the drill to cut cleanly.
Practice makes perfect with freehand drilling.
Advanced Strategies And Jigs
Drilling a perfect 45-degree hole requires precision. It’s essential for creating strong, angled joints in woodworking. To make this task easier and more accurate, advanced strategies and specialized jigs are paramount.
Creating A Custom Jig For Repeated Accuracy
A custom jig ensures consistent results when drilling multiple holes at a 45-degree angle. Here’s how to create one:
- Cut a piece of wood to act as the jig base.
- Attach a cleat at a 45-degree angle on this base.
- Secure your workpiece against the cleat.
- Use a drill with a guide bushing to ensure the angle.
By following these steps, you’ll have a custom jig for repeated use, saving time while improving accuracy.
Leveraging Commercial Jigs For Efficiency
Commercial jigs are ready-made solutions for drilling angled holes precisely. They come in various styles suited for different tasks. Here’s how to leverage them:
- Choose a commercial jig compatible with your drill.
- Set the jig to a 45-degree angle according to the manufacturer’s instructions.
- Clamp the jig to your workpiece.
- Drill through the guide to achieve an accurate angle.
These jigs save setup time and increase efficiency, especially for one-off projects.
Troubleshooting Common Issues
Drilling a perfect 45-degree hole requires precision, yet common issues often arise. This section sheds light on these challenges, offering solutions to keep your project on track without frustration.
Correcting Drift And Run-out
Drift and run-out can throw a drill bit off course. Here’s how to fix these issues:
- Check your drill press for misalignment.
- Secure your piece firmly to prevent movement.
- Adjust the table and fence for straight drilling paths.
- Use sharp drill bits to minimize wandering.
If drift persists, consider a drill guide for added stability.
Dealing With Hardwoods And Knots
Hardwoods and knots present unique challenges. Here’s how to tackle them:
- Choose the right drill bit for hardwoods, like a brad-point.
- Increase drill speed for cleaner cuts in hard wood.
- Approach knots with care to avoid deflection.
- Start with a smaller pilot hole when tackling a knot.
For extra hard knots, a spade bit or forstner bit may be better.
Finishing The Job
Drilling the perfect 45-degree hole is just one part of the process. Finishing the job with precision ensures longevity and a clean look for your woodworking project. Follow these steps to clean, sand, and prepare your drilled holes for the next stage of construction or crafting.
Cleaning And Sanding The Holes
Once you have drilled your holes, remove any lingering wood chips or debris. Use a small brush or compressed air to thoroughly clean inside the hole. This prevents any roughness or irregularities.
- Inspect the hole for splinters or rough edges.
- Use a finer sandpaper to gently sand the edges of the hole.
- Proceed with sanding until the surface is smooth to the touch.
- Wipe down the area with a damp cloth to collect any residual dust.
Next Steps After Drilling
The holes are now clean and smooth, ready for whatever comes next in your project. Whether you’re inserting dowels, screws, or preparing for a finish, these holes are the perfect start.
- Test fit any components that will be inserted into the hole.
- If holes are for screws, choosing the right size screw is vital for a snug fit.
- For dowels or other inserts, apply the appropriate wood glue or adhesive before inserting.
- Once everything is in place, clamp as needed and allow to dry according to the adhesive’s instructions.
Take pride in your work as you complete the finishing touches. Remember, precision in the final stages makes all the difference in the quality and appearance of your woodworking project.
Credit: www.homedepot.com
Frequently Asked Questions On How To Drill A Hole At 45 Degrees
How Do You Drill A Hole In A Specific Angle?
To drill a hole at a specific angle: 1. Use an angle guide or jig aligned to your desired angle. 2. Mark the entry and exit points on the workpiece. 3. Steadily hold the drill at the angle, starting with a pilot hole.
4. Re-check alignment to ensure accuracy. 5. Complete drilling to the required depth.
How Do You Make An Angled Hole In Wood?
To make an angled hole in wood, mark your desired angle, use an angle guide or jig, clamp the wood down, and drill with a bit suited for the material.
How Do You Drill A Right Angle?
To drill a right angle, follow these steps: 1. Use a right-angle drill attachment for precision. 2. Secure the workpiece to prevent movement. 3. Start slowly to establish the hole. 4. Maintain the drill’s position with a guide or jig. 5.
Drill steadily, watching the angle alignment.
How Do You Drill A Perpendicular Hole?
To drill a perpendicular hole: 1. Use a drill press for stability and precision. 2. Mark the exact drill spot with a center punch. 3. Choose the correct drill bit for the material. 4. Align the bit with the mark, using a square for guidance.
5. Drill with steady pressure, keeping the drill vertical.
What Tools Are Needed For Angled Drilling?
To drill a hole at a 45-degree angle, you will need an adjustable drill guide or a drill press with an angled jig, a suitable drill bit for your material, clamps to secure the workpiece, and potentially a marking tool to pinpoint the exact drilling location.
Conclusion
Mastering the art of drilling at a 45-degree angle is all about precision and technique. With the right tools and guidance, anyone can achieve clean, angled holes for their projects. Remember to choose the correct drill bit, secure your workpiece, and mark your guide lines clearly.
Keep practice and patience at the forefront, and you’ll soon make perfect angled cuts every time. Ready to take on your next woodworking challenge? Grab your drill and let’s make those perfect angled holes!

Passionate Bowler and Bowling Enthusiast
Jess Pinelli is a dedicated bowling enthusiast with a deep love for the sport that spans over 6 years. With numerous strikes, spares, and a few gutter balls under hes belt, he has honed his skills on lanes across the country. Pinelli’s journey in the world of bowling has been a remarkable one, from casual weekend games with friends to competitive league play and even a few local tournaments.
Driven by her passion for the game, Pinelli decided to channel her expertise and knowledge into the digital realm, becoming a prolific author on this bowling website. She’s your go-to source for everything bowling-related, from mastering the perfect hook to choosing the right bowling ball and even navigating the world of bowling etiquette.
When she’s not busy writing informative articles or reviewing the latest bowling gear, you’ll likely find Pinellis at her favorite local bowling alley, helping newcomers improve their game or enjoying some friendly competition with fellow bowlers. She firmly believes that bowling is not just a game but a community, and she’s committed to fostering that sense of camaraderie both online and offline.