Bowling ball spinner diy! A DIY bowling ball spinner can be built using a motor, spindle, and sturdy base. Ensure safety and stability for effective at-home ball maintenance.
Bowling enthusiasts often seek ways to maintain and resurface their bowling balls to keep them in peak condition. Crafting a homemade bowling ball spinner is a cost-effective solution for those who enjoy a hands-on approach to their sport. Having a personal ball spinner at home allows bowlers to polish and sand their balls conveniently, providing consistent performance on the lanes.
With some basic mechanical skill and the right materials, creating a spinner can be a rewarding project. It’s essential to source a reliable motor that can handle the weight of the ball and rotate it at the right speed for even application of cleaners or polish. A strong base is crucial to prevent wobble and potential damage, making the process safer and producing better results. This DIY project can prove to be both an enjoyable and practical addition to any bowler’s toolkit.
Credit: www.nainc.org
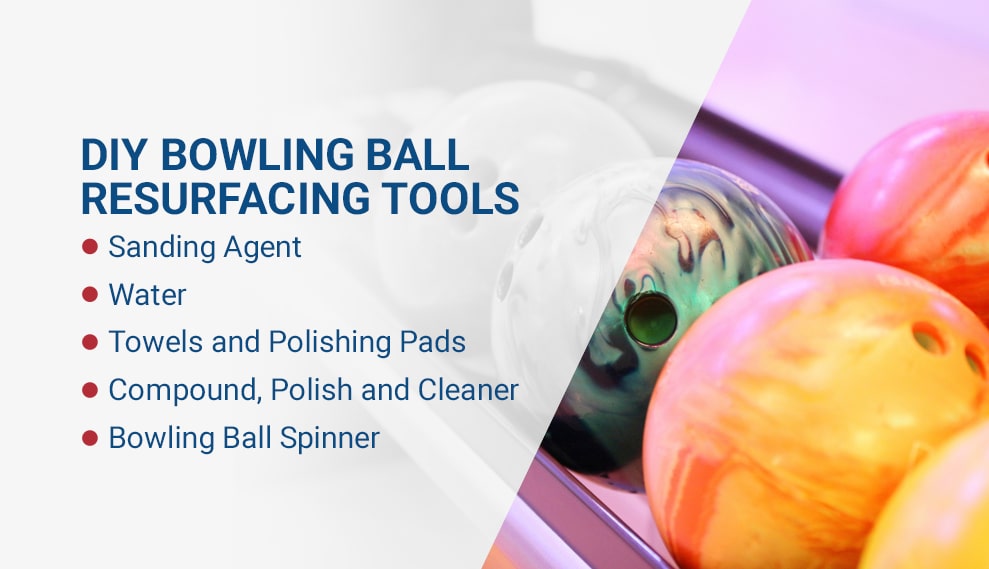
Tools And Materials Required
Embarking on your DIY Bowling Ball Spinner project requires the right toolkit. The perfect bowling ball spinner can revolutionize your game, providing that pristine, polished look every time. But first, you need to gather a few essential tools and materials. Getting these ready will ensure a smooth crafting experience.
List Of Essential Tools
The success of your DIY project hinges on having the proper tools. Below is a list of items that you’ll need to begin:
- Drill: Powers the spinner
- Screwdriver set: For easy assembly
- Wrenches: For securing components
- Measuring tape: For accurate dimensions
Choosing The Right Materials
Materials determine the durability of your spinner. Consider these:
| Material | Use |
|---|---|
| Wood or Metal | Base foundation of spinner |
| Carpet or Rubber | Surface protection |
| Bearings | Ensures smooth spinning |
Select materials that provide stability and longevity. A solid base and high-quality bearings are non-negotiable for optimal performance. A protective surface layer, like carpet or rubber, can also help prevent damage to your bowling balls.
Credit: www.nainc.org
Designing Your Spinner
Creating a custom DIY bowling ball spinner brings a touch of personal craftsmanship to your bowling experience. Crafting this piece of equipment requires planning and precision. It is essential to consider the spinner’s size, specifications, and a detailed blueprint. Let’s dive into designing the perfect spinner for your bowling ball.
Spinner Size And Specifications
The size and specifications of your spinner play a crucial role. Consider the space you have available and the size of your bowling ball. A standard spinner should accommodate different ball sizes, which typically range from 8.5 to 8.95 inches in diameter. Below is a table outlining the key dimensions you should note:
| Component | Size | Material |
|---|---|---|
| Base | 24″x24″ | Plywood |
| Spinner Wheel | 13″ Diameter | Reinforced Plastic |
| Motor | Variable Speed | N/A |
Blueprints And Schematics
Blueprints guide the building process. Detailed schematics ensure accuracy and functionality. The schematics below outline the assembly of your spinner.
- Base Plate Layout: This shows where to fix the motor and spinner wheel.
- Electrical Plan: It highlights wiring for the motor and controls.
- Mounting Design: This includes how to secure the bowling ball on the spinner.
Accurate schematics ensure a smooth build. They provide a visual guide and cut list for assembling your spinner easily and safely.
      +-----------------------------------+
      |           DIY Spinner             |
      |                                   |
      |              Motor                |
      |               ||                  |
      |   Bowling Ball == Spinner Wheel   |
      |                                   |
      +-----------------------------------+
Step-by-step Assembly
Roll up your sleeves and get ready to make your very own DIY Bowling Ball Spinner with this step-by-step assembly guide. Dive into the craft of building your spinner, enhancing your ball maintenance without breaking the bank.
— Building The Base Unit —
Start with a solid foundation for your spinner.
- Cut a sturdy piece of plywood to serve as the base.
- Gather four rubber feet and secure them at each corner of the base.
- Ensure the base is level and stable before moving on.
— Installing The Motor —
Next, focus on the heart of the spinner: the motor.
- Choose a compatible motor that can handle your bowling ball’s weight.
- Mount the motor centrally with screws onto the base plate.
- Connect the motor to a power source with necessary electrical wiring.
— Mounting The Bowling Ball —
Finally, prepare the mount for your bowling ball.
| Action | Detail |
|---|---|
| Attach the Cup | Securely fasten a rubber cup to the motor’s spindle. |
| Test the Fit | Place the bowling ball on the cup to test stability. |
| Tighten the Grip | Adjust the tension if necessary to ensure a snug fit. |
Electrical Setup
An effective DIY bowling ball spinner springs to life with the right electrical setup. Ensuring a safe and operational motor connection is crucial to harness the ultimate spinning action. Let’s shed some light on configuring the electrical components of your spinner.
Safety First: Electrical Precautions
Before diving into the electrical work, prioritize safety. Here’s a quick checklist:
- Turn off all power sources.
- Use insulated tools to prevent shocks.
- Wear protective gear like gloves and goggles.
- Ensure the workspace is dry and well-lit.
Wiring The Motor
Connecting the motor sets the spinner in motion. Follow these steps:
- Identify the motor’s power and ground wires.
- Connect wires to a switch for easy control.
- Ensure all connections are secure and insulated.
Power Supply Considerations
| Power Supply Feature | Details |
|---|---|
| Voltage & Current Rating | Must match the motor’s requirements. |
| Type | Choose between AC or DC based on motor type. |
| Protection | Integrated overload protection is essential. |
Align the power supply to the spinner’s demand for seamless performance.
Testing And Troubleshooting
After creating your DIY bowling ball spinner, testing and troubleshooting play crucial roles. Proper testing ensures that the spinner operates smoothly. This section will guide you through initial tests, and help resolve common issues.
Initial Spinner Tests
Start with safety checks. Confirm all parts secure. Make sure your DIY spinner sits stable. Observe the movement of the bowling ball. Listen for any unusual sounds.
Test the speed. The ball should rotate evenly. If not, adjust the motor speed. Keep an eye on the ball’s balance. Uneven rotation means adjustments needed.
Common Issues And Solutions
DIY projects can face several issues. Here’s how to fix them:
- Spinner Not Rotating: Check the power supply. Ensure connections are tight. Motor issues might require replacement.
- Noisy Operation: Tighten any loose fittings. Use lubrication on any moving parts. This reduces friction and noise.
- Uneven Ball Rotation: Adjust the ball support arms. Ensure the ball is centered properly.
Remember: always unplug the spinner before making any adjustments. Safety first!

Credit: www.nainc.org
Maintaining Your Bowling Ball Spinner
Keep your Bowling Ball Spinner in top shape with easy maintenance. Regular care not only boosts performance but also extends its life. Get ready to perfect your equipment’s condition with these simple steps.
Cleaning And Maintenance Tips
- Wipe down the spinner after each use.
- Use a soft cloth and non-abrasive cleaner.
- Check for loose parts or unusual sounds.
- Lubricate moving parts as needed.
- Ensure the work area is clean to avoid contamination.
These steps prevent build-up and keep your spinner running smoothly. Don’t wait for issues to arise. Regular cleaning is key.
Spinner Longevity And Upgrades
Maintain your spinner’s efficiency with proper upgrades. Here’s what you can do:
- Replace spinner surface pads when worn out.
- Check for latest accessory compatibility.
- Upgrade to a variable speed motor for better control.
- Consider a spinner cover to protect it from dust.
Staying ahead with upgrades enhances spinner performance. Your DIY bowling ball spinner will reward you with a longer lifespan.
Frequently Asked Questions Of Bowling Ball Spinner Diy
How Do You Make A Bowling Spinner?
To make a bowling spinner, focus your grip and release. Hold the ball with your fingers spread around its equator, and during your release, rotate your wrist, fingers, and forearm to impart a spinning motion. Practice consistently to refine your technique.
How Do You Make A Bowling Ball Glide?
To make a bowling ball glide, polish the ball to reduce friction and choose lanes with heavier oil patterns. Properly release the ball with a smooth motion for optimal gliding. Maintain a clean ball surface for consistent performance.
How Do You Put A Spin On A Bowling Ball?
To put a spin on a bowling ball, grip it with your fingers in the holes, swing your arm smoothly, and twist your wrist upon release. This rotational motion imparts the spin needed for the ball to curve down the lane.
How Do You Resurface A Bowling Ball With A Spinner?
Clean the bowling ball with ball cleaner. Place the ball on the spinner. Attach sanding pads to the spinner. Gently apply even pressure while the spinner rotates the ball. Progress through finer grits until the desired finish is achieved.
Conclusion
Creating your own bowling ball spinner can lead to enhanced game performance and savings. With a DIY approach, you customize your spinner to fit personal preferences. Embrace the challenge; your newly improved skills on the lanes await. Happy crafting and even happier bowling!
Passionate Bowler and Bowling Enthusiast
Jess Pinelli is a dedicated bowling enthusiast with a deep love for the sport that spans over 6 years. With numerous strikes, spares, and a few gutter balls under hes belt, he has honed his skills on lanes across the country. Pinelli’s journey in the world of bowling has been a remarkable one, from casual weekend games with friends to competitive league play and even a few local tournaments.
Driven by her passion for the game, Pinelli decided to channel her expertise and knowledge into the digital realm, becoming a prolific author on this bowling website. She’s your go-to source for everything bowling-related, from mastering the perfect hook to choosing the right bowling ball and even navigating the world of bowling etiquette.
When she’s not busy writing informative articles or reviewing the latest bowling gear, you’ll likely find Pinellis at her favorite local bowling alley, helping newcomers improve their game or enjoying some friendly competition with fellow bowlers. She firmly believes that bowling is not just a game but a community, and she’s committed to fostering that sense of camaraderie both online and offline.