When and How to Sand a Bowling Ball for Better Performance?
 Remember the wood-shop classes in high school? Do you remember using sandpaper to smooth out your wooden pieces? Just like wood, bowling balls also need sanding. And for that different sandpapers with different grits are used. Besides manufacturing, there are other times when a bowling ball is sanded. It’s alright if you don’t have any idea about that. I am here to tell you when and how to sand a bowling ball, so that next time you can do it yourself and also know when to do it. So stay tuned if you’re interested to know more.
When should you sand a bowling ball?
A lot of times when you are bowling, the lane condition might seem a little different or there might be a change in the oil pattern. Now, instead of changing your bowling ball, you should try sanding your bowling ball. Let me assure you, you will see an immediate change in your ball’s performance.
If you have a dull, aggressive bowling ball that is picking too much oil from the lane, this is when you need to sand the surface of the bowling ball. When your bowling ball shines up too much over time, you will get terrible ball motion on the lane. A little bit of sanding will create dramatic changes in motion and will also pick up less oil from the lane.
Sanding is also popular among bowlers who purchase a bowling ball for its unique features but don’t like the surface finish. To change that, the option of sanding really comes in handy. Making this slight change in surface finish significantly boosts their ball performance and it allows them to modify it the way they want.
You should also think of sanding your bowling ball after every few matches, especially if your ball already has a sanded finish. The more oil build-up there is, the more it is likely to get oily. A little bit of sanding will resurface the ball, remove the oil build-up, and will revive the ball’s performance.
How to sand a bowling ball by hand?
Now, hold on a second before you take your bowling ball to the pro shop for some basic sanding. Good news! You can do it yourself at home. If you have the necessary tools and materials at home, why waste money at the pro shop? To sand a bowling ball, you are gonna need a bowling ball cup or a ball spinner (if you have that already), some abrasives (500, 800, 1000, 2000, 3000, 4000, or 5000 grit discs), water, ball polish or compound, and polishing pads or towels.
So have you assembled all of the materials you need to sand your bowling ball at home? Then let’s get started!
- Step 1
First and foremost, decide which surface finish you want your balls to have. Based on that you should pick your sanding paper grit and technique. Lower grits will give your ball more surface. As a result, it will roll better in heavy oil conditions. Low grit + low rev and high ball speed will ensure magnificent ball performance. Contrarily, if you opt for higher grits, it will give your ball more surface. This will allow you to control your ball better and ensure a longer hook phase.
- Step 2
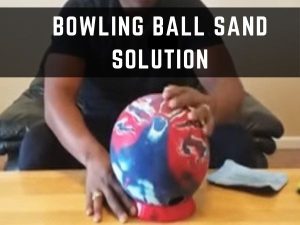
Once the outcome of the ball’s surface is decided, set your bowling ball on the spinner or on the bowling ball cup with the finger holes facing the top. If you’re doing it by placing the ball on the cup, first sand the top half of the ball where the holes are in the upward position. Then flip the ball and sand the other half of the bowling ball where the holes are facing downward. In the ball spinner, you have to do the same. Besides rotating your ball 180°, you can also rotate it 90° to sand the sides.
- Step 3
Now, time to lubricate the bowling ball. This will prolong the ball’s life and also prevent dust from flying around. So spray some water to reduce the frictional heat and dust spread when the sanding pad is moving on the bowling ball. If your ball is placed on a cup, spray only the top half, sand it, and then flip and spray the remaining half. For the ball that is set on a spinner, start with the lowest speed setting to avoid any mistakes.
- Step 4
Now, cup the abrasive pad in your hand and start sanding your bowling ball in a circular motion, and just keep moving your hand around the ball. Make sure your fingers don’t get in between the pad and the ball. Don’t use the back-and-forth motion to sand your ball, always keep moving your hand in a circular motion. Once you see the wetness on the ball has disappeared, know that it is indicating that the ball is sanded. Now, flip the ball over and reposition it as I have said before, and repeat the process. Make necessary positions until you get the entire surface sanded.
- Step 5
Once the sanding step is done, wet your bowling ball again and wipe it clean using a fresh and dry microfiber towel. Now, you can apply a compound on your ball’s surface to get the dust that is on the ball to get it nice and clean. After that, if you want to polish your ball, get a good-quality polishing agent and apply that on the ball. This will give the ball a tacky finish and of course, a sharp reaction on the backend. Continue the process until your ball gets shiny.
Step 6
Lastly, take your ball off the spinner, or off the cup and give it one final wipe with a dry clean towel. Don’t forget to clean the finger holes as well. And voila! Your bowling ball is now ready for some real action!
What grit sandpaper should I use on my bowling ball?
Don’t know where to begin? If you’re making some major changes to the ball surface, you should start with lower grit pads and slowly build your way up. You might need to repeat the process 2-3 times till you get your desired surface finish. If it is a lower-grit abrasive you’re using, apply a bit more pressure. If it is a higher-grit pad, apply less pressure and continue the process for a long time.
However, which grit you’re opting for is entirely up to you. If your bowling ball already has a low-grit surface (let’s say 500 grit), there’s no need to own a 5000 grit abrasive. Similarly, if you have a high-grit bowling ball, there’s no use in carrying a low-grit abrasive. Most bowlers with matte bowling balls like to carry the 1500 grit surface because either ball’s surface is either a bit less, equal, or more than 1500 grit. So, I would advise that you carry some bowling abrasive pads that are around the surface of your ball. Unless you’re planning to make some dramatic changes, then you have to purchase a pad according to the ball’s finish you’re opting for.
How often do you sand a bowling ball?
As a general rule of thumb, you should sand your bowling ball after every 60 games. If you are an avid bowler and practice a lot, you might need to do it a bit more often. If you even notice your ball’s performance is off during mid-game, you can give your ball a little sanding. For that, you have to keep some abrasive pads in your bowling bag.
Conclusion
Get ready to see the best reaction from your bowling ball. The bowling ball surface is a paramount feature of a bowling ball that you can’t just overlook. Sanding and an essential part of a bowling ball. Every bowler should learn that. This article has described the ways to sand a bowling ball precisely. If you still have any questions, hit me up. I will definitely assist you. Till then, good luck and keep on bowling, my fellow bowlers! See ya later!

Passionate Bowler and Bowling Enthusiast
Jess Pinelli is a dedicated bowling enthusiast with a deep love for the sport that spans over 6 years. With numerous strikes, spares, and a few gutter balls under hes belt, he has honed his skills on lanes across the country. Pinelli’s journey in the world of bowling has been a remarkable one, from casual weekend games with friends to competitive league play and even a few local tournaments.
Driven by her passion for the game, Pinelli decided to channel her expertise and knowledge into the digital realm, becoming a prolific author on this bowling website. She’s your go-to source for everything bowling-related, from mastering the perfect hook to choosing the right bowling ball and even navigating the world of bowling etiquette.
When she’s not busy writing informative articles or reviewing the latest bowling gear, you’ll likely find Pinellis at her favorite local bowling alley, helping newcomers improve their game or enjoying some friendly competition with fellow bowlers. She firmly believes that bowling is not just a game but a community, and she’s committed to fostering that sense of camaraderie both online and offline.
